How to Install an Automatic Bilge Pump
 Select a pump with the same output or greater than the original pump.
Jim Hatch
Select a pump with the same output or greater than the original pump.
Jim Hatch
A dewatering device is strongly recommended by the US Coast Guard aboard boats, and electric bilge pumps fulfill this role. However, bilge pumps can wear out. Replacing the old pump with one that has a built-in automatic switch simplifies the installation by eliminating the need to mount and connect a separate automatic switch.
A number of models feature built-in switches that sense high bilge water and automatically begin dewatering. Attwood Marine, Johnson Pumps, Rule Industries, T-H Marine, and others offer automatic bilge pumps of various sizes and outputs, as measured in gallons per hour.
Select a pump with the same output or greater than the original pump (see the chart below). For more on bilge-pump output, visit boatingmag.com/choosing-right-bilge-pump. This project assumes that the boat already has a discharge hose leading to a through-hull fitting that is at least 8 inches above the heeled waterline.
Less than 18 feet:1,000 gph18 to 25 feet:2,500 gph25 to 32 feet:4,000 gph32 to 36 feet:6,000 gph36 to 45 feet:8,500 gphHere are rules of thumb for deciding on the best bilge-pump output based on boatlength. If in doubt, err on the side of greater output.Your bilge-pump system should have a dedicated switch. If your boat doesn’t have one, stand-alone switches are available from the same brands that offer automatic bilge pumps.
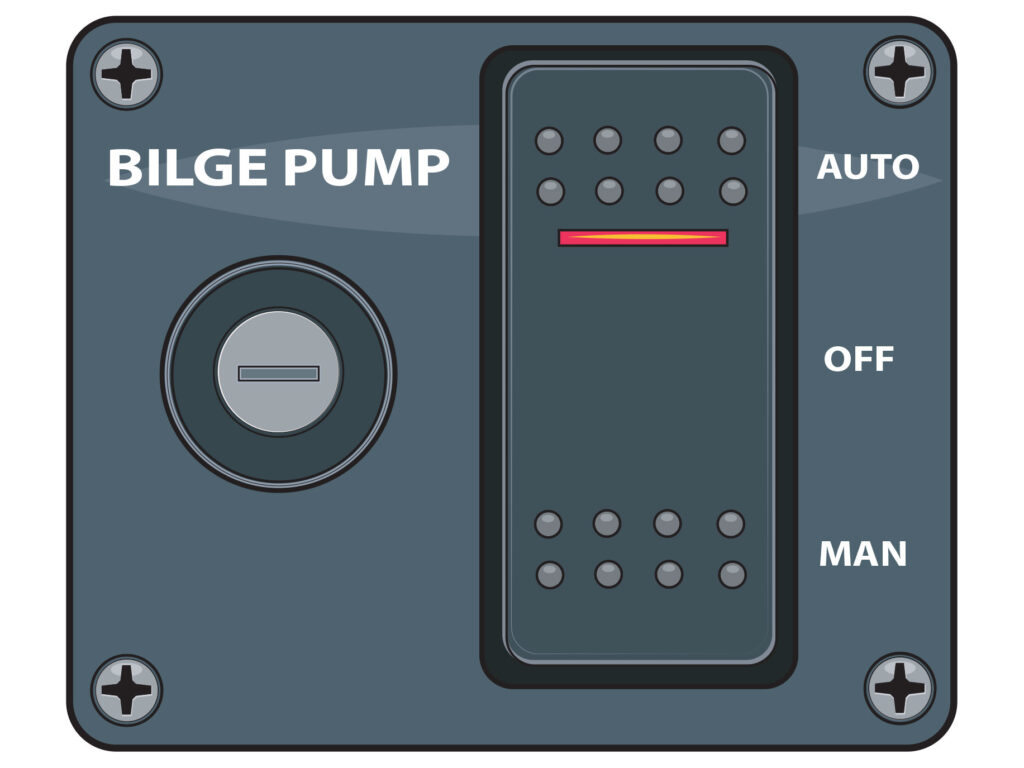
For this installation aboard a 17-foot flats skiff, we chose to retrofit with the Rule-Mate 1100 automatic bilge pump (1,122 gph). This 12-volt DC pump kicks into gear when bilge water reaches 2 inches and shuts down at 3/8 inch. It has a check valve to prevent backflow of water. We matched it with a Rule Model 43 three-way lighted rocker-panel bilge-pump switch.
Skill Level: 1 of 5
Finish Time: Approx. 2-3 hours
Tools and Supplies- Rule-Mate 1100 automatic bilge pump (westmarine.com)
- Rule three-way lighted rocker-panel bilge-pump switch, Model 43 (amazon.com)
- 1-inch ID flexible hose (if replacing the discharge line)
- Two stainless-steel hose clamps
- Power drill and bit set
- Jig saw or coping saw
- Phillips screwdriver
- Slotted screwdriver or hex driver (for hose clamps)
- Various crimp connectors with heat-shrink collars
- Wire strippers and crimping tool
- Heat gun
- Zip ties to support wires
- Marine silicone sealant
- Shop rags (to wipe away excess sealant)
 When choosing a location it’s important to have easy access for maintenance.
Jim Hatch
Select a Location
When choosing a location it’s important to have easy access for maintenance.
Jim Hatch
Select a Location
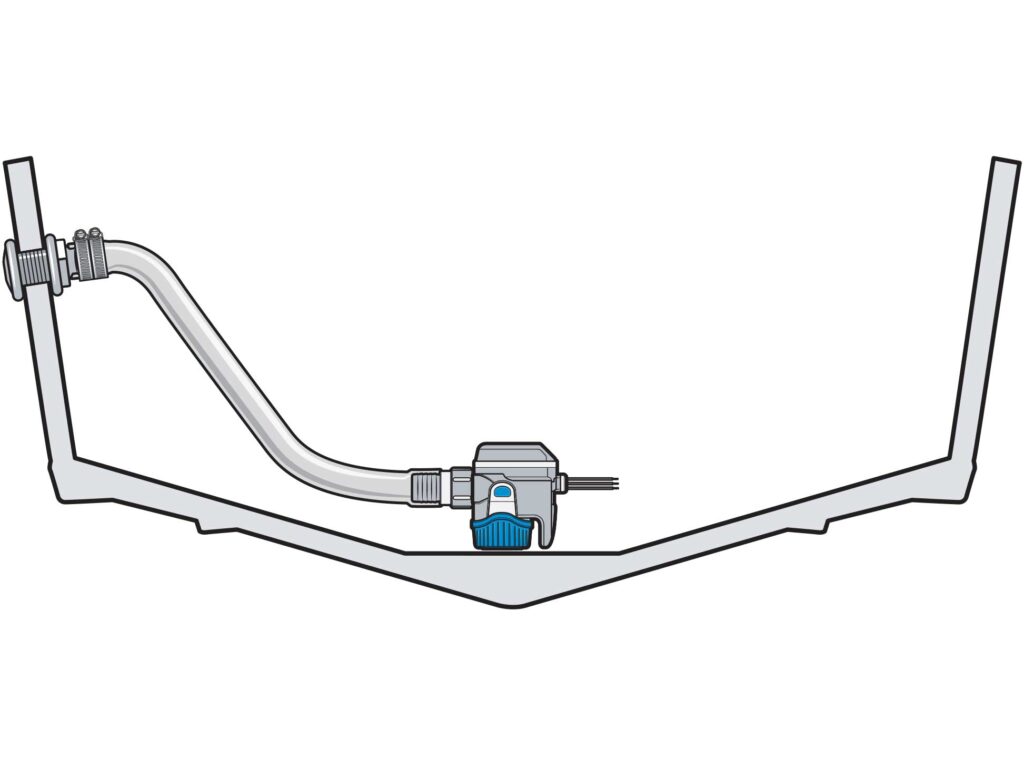
It often proves easiest to use the same location as the previous bilge pump, which is usually near the stern of the boat and as deep in the bilge as is practicable. Just as important is access for installation and cleaning the pump grate (and removing the check valve during the winterization process). There is often a hatch or deck plate above the pump for this purpose. Many boats have pads ’glassed onto the hull interior. This elevates the pump a bit so that it’s not running continuously from residual bilge water, and gives you a place to fasten the pump without drilling into the hull proper.
Tip: When selecting a bilge pump, take into account “lift”—the vertical distance a pump must raise water to reach the discharge fitting. Lift reduces the rated output. With the Rule-Mate 1100, for example, a 3.3-foot lift cuts the output to 792 gph; a 6.7-foot lift cuts output to 456 gph.
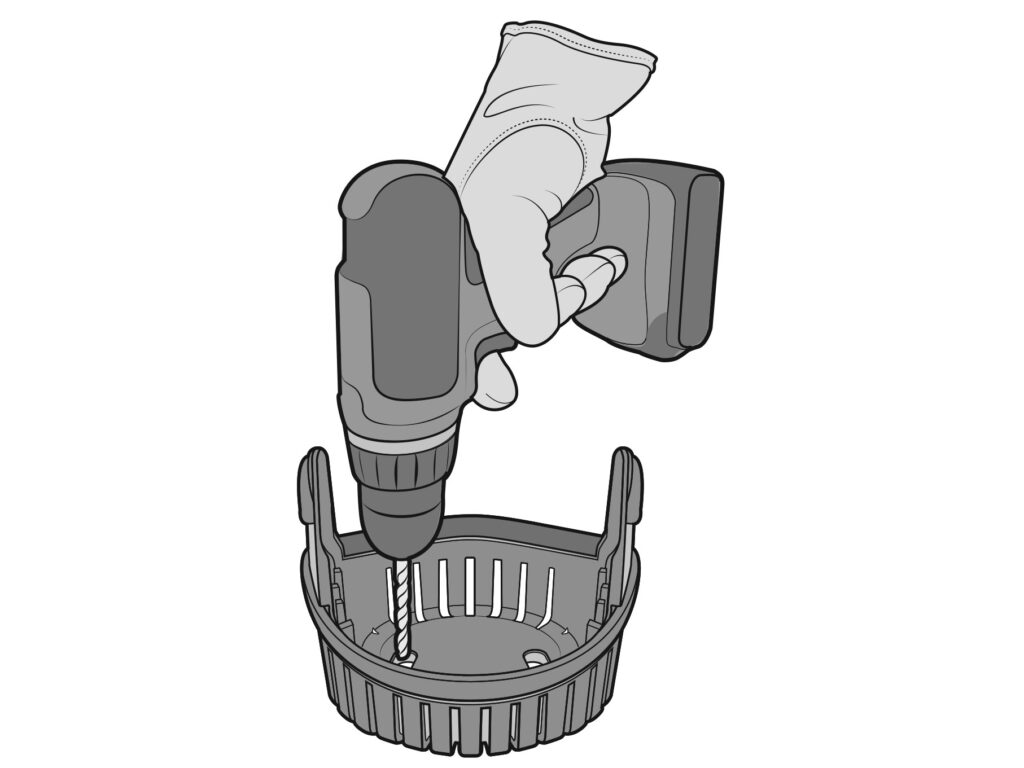 Use the base as a template to mark two holes for drilling.
Jim Hatch
Install the Pump
Use the base as a template to mark two holes for drilling.
Jim Hatch
Install the Pump
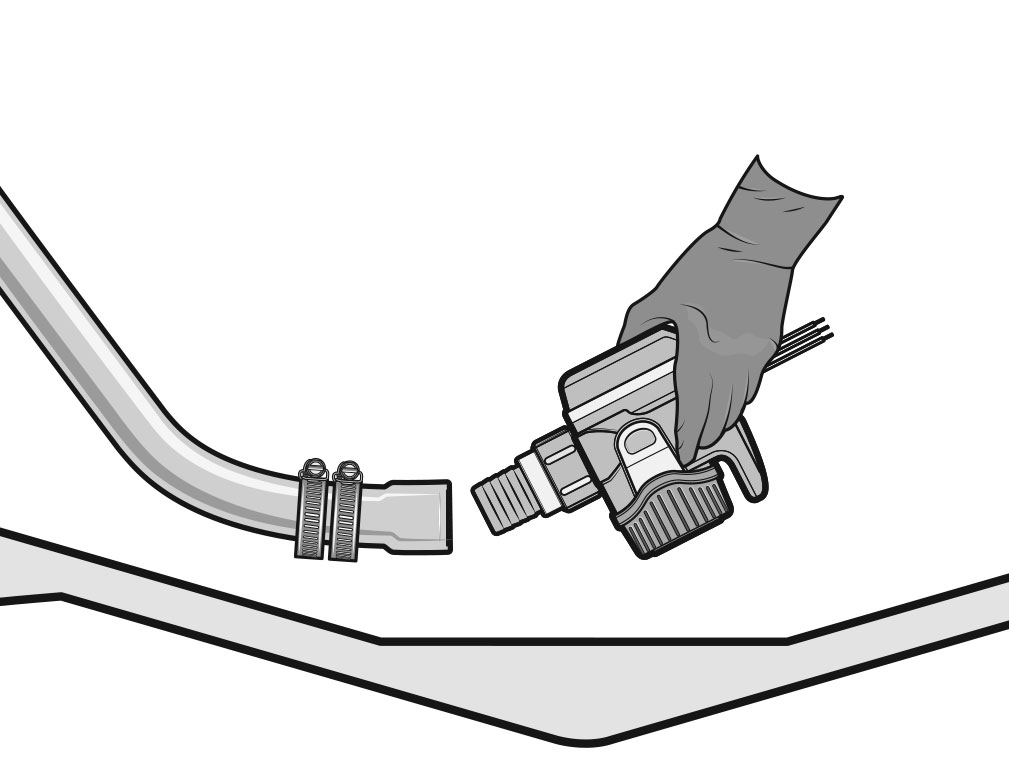
Detach the base grate from the pump by pressing on the two tabs. Then use the base as a template to mark two holes, ensuring that the pump will be oriented so that the discharge hose can be easily attached to the outlet. Drill the two holes with a 1⁄8-inch bit in the mounting pad, taking care not to drill through too far. Dab each hole with marine sealant, and drive in No. 8 self-tapping stainless-steel screws of appropriate length to secure the pump but not penetrate the hull. Attach the outlet hose with two stainless-steel hose clamps to the pump fitting, and snap the pump into position.
Tip: If you need to replace the discharge hose, know that smoothbore marine hose offers less resistance to water flow than does corrugated hose, thus improving efficiency in removing bilge water. If possible, choose flexible smoothbore marine hose or sanitation hose.
 Use a jigsaw to create a cutout for the bilge pump switch.
Jim Hatch
Install the Switch
Use a jigsaw to create a cutout for the bilge pump switch.
Jim Hatch
Install the Switch
Using a jig saw, carefully create a 2 5 ⁄16-inch-wide-by-1 11 ⁄16-inch-tall cutout in an accessible location on the dash. Insert the 2 7⁄8-inch-wide-by-2 3⁄8-inch-tall switch panel into the cutout and mark the four mounting holes, ensuring that the panel is aligned as you wish. Remove the panel and drill the four holes with a 1⁄8-inch drill bit, then slightly chamfer them with a countersink bit to prevent chipping when driving in the fasteners. Place the panel in the cutout, dab each hole with marine sealant, and then carefully drive in the supplied No. 8 flat-head self-tapping screws. Do not overtighten.
Tip: The Rule switch requires adding a glass fuse through a twist-and-lock port on the face of the panel. Refer to the chart in the instruction manual to determine the amperage for the fuse based on the length and gauge of the wire run between the switch and the pump.
 Ensure that all wires are supported and don’t sag into any bilge water.
Jim Hatch
Run the Wires
Ensure that all wires are supported and don’t sag into any bilge water.
Jim Hatch
Run the Wires
The Rule-Mate pump has three wires, and you will need to add extensions to at least two. Use crimp-on butt connectors with heat-shrink collars to create corrosion-resistant connections. Choose the gauge wire for the run based on the chart provided in the instruction manual. Run the brown and brown/white wires to the switch at the helm. Run the black wire to the ground circuit. You will also need to run a separate positive wire (hot line) directly from the positive terminal of the battery to the switch at the helm. Ensure that all wires are supported and don’t sag into any bilge water.
 Crimp on the supplied female spade connectors, and connect them to the male spade connectors on the back of the switch.
Jim Hatch
Make the Connections
Crimp on the supplied female spade connectors, and connect them to the male spade connectors on the back of the switch.
Jim Hatch
Make the Connections
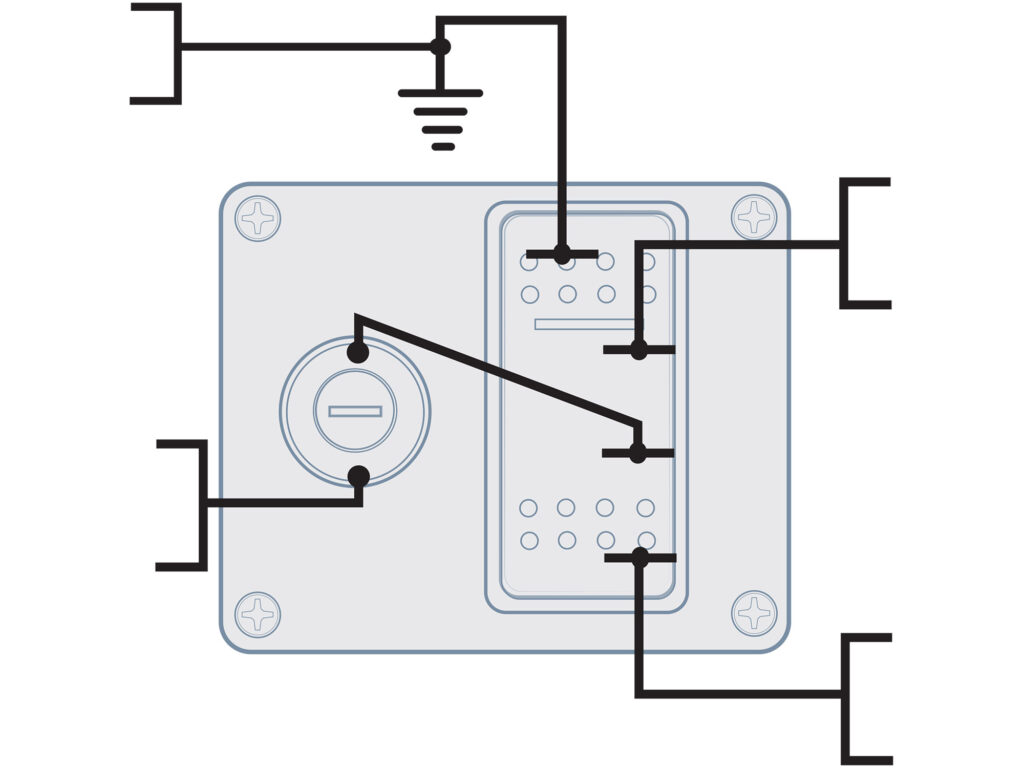
Crimp on the supplied female spade connectors to the brown, brown/white and hot line, and connect them to the male spade connectors on the back of the switch as follows: brown to auto function, brown/white to manual override function, and hot line to the open spade connector at the back of the fuse port. Connect the spade connector for ground function on the switch to the ground circuit with a black wire. Crimp on ring connectors to the opposite end of the hot line and black wire, and connect to the positive terminal of the battery and ground circuit, respectively.
Testing the SystemTo test the Rule-Mate automatic-bilge-pump system, press down the momentary switch at the bottom of the rocker and listen for the whirring of the pump, indicating that the manual override function is working. Next press the latching switch at the top of the rocker. An indicator light confirms that power is getting to the pump. Then touch the Pumpcheck button on the pump itself on the opposite side of the outlet, hold your finger there for 5 seconds, and listen for the pump to begin running, indicating that the automatic function is also working.
The post How to Install an Automatic Bilge Pump appeared first on Boating Mag.